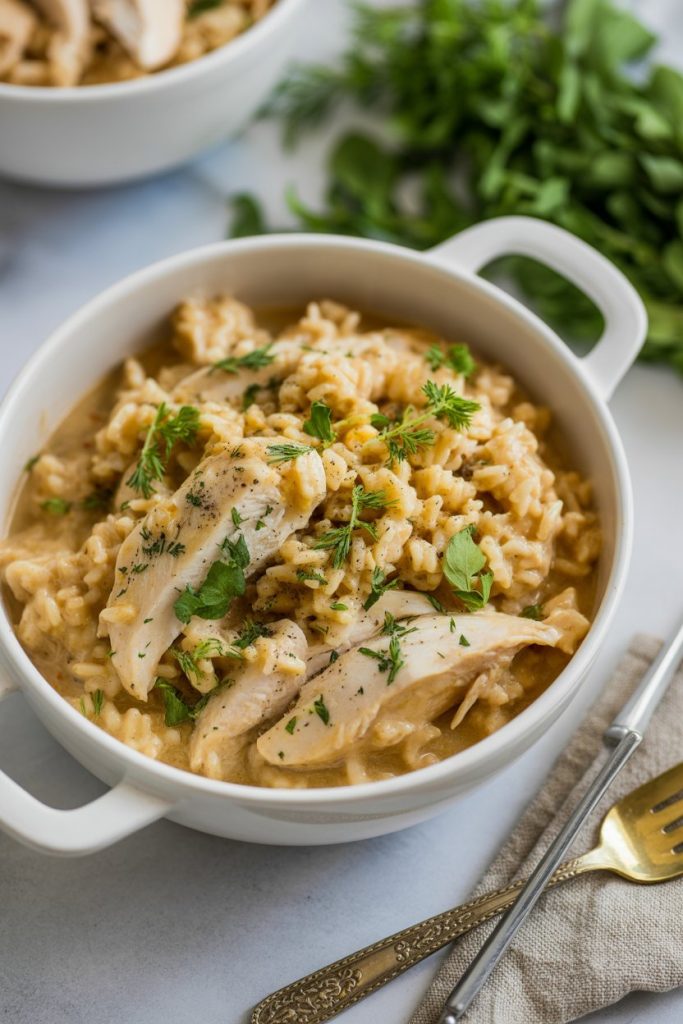
No-Peek Chicken and Rice: Easy One-Pan Comfort Dinner - Fast
Let's be real, some nights you just want dinner to magically appear, right? You're tired, hungry, and the thought of complex recipes or a pile of dirty dishes is a hard pass. But what if we told you there's a dish so ridiculously easy, so utterly comforting, and so unbelievably hands-off that it practically cooks itself? Your weeknight prayers have been answered! Get ready for No-Peek Chicken and Rice: the ultimate Easy One-Pan Comfort Dinner that comes together incredibly Fast, letting you relax while dinner practically makes itself!
Why This Recipe is Awesome
Because it’s basically the culinary equivalent of hitting "snooze" on a Monday: satisfying and surprisingly efficient. You season the chicken, dump it on rice and broth, cover it, and forget about it for a bit. No stirring, no babysitting, no frantic “did I burn it?” panic. Sounds like a dream, right?
Here’s the good stuff: its forgiving, feeds four-ish people, and tastes like you put effort into it even if you didnt. Use cheap cuts (hello, thighs), toss in some veggies, and boom—comfort food without drama. FYI: if you like crispy skin, I’ve got a sneaky trick at the end.
Ingredients Youll Need
| Ingredient | Amount | Notes (short and sassy) |
|---|---|---|
| Bone-in, skin-on chicken thighs | 4 (about 2 lbs / 900 g) | Best for flavor and moisture. Dont fight me on this. |
| Long-grain white rice (e.g., jasmine or basmati) | 1 1/2 cups (300 g) | Fluffy results. Not instant rice. |
| Low-sodium chicken broth | 3 cups (720 ml) | Control sodium; you can always salt later. |
| Yellow onion | 1 medium, finely chopped | Sweetness city. |
| Garlic | 2 cloves, minced | More if youre dramatic. |
| Olive oil | 2 tbsp | For browning; do it if you want flavor. |
| Frozen peas & carrots | 1 cup | Optional, but color makes people happy. |
| Butter | 2 tbsp | Finishes the rice with silky vibes. |
| Paprika | 1 tsp | Smokey and pretty. |
| Dried thyme | 1 tsp | Herby cheerleader. |
| Salt & pepper | To taste (about 1 tsp salt, 1/2 tsp pepper) | Season like you mean it. |
| Lemon (optional) | 1, zested or sliced | Brightens things up if you’re fancy. |
Step-by-Step Instructions
- Preheat your oven to 375°F (190°C). Get your favorite oven-safe pot or Dutch oven ready. Trust me: the tight lid matters.
- Pat the chicken dry with a paper towel. Season both sides with salt, pepper, paprika, and half the thyme. Dry skin = better browning later.
- Heat olive oil over medium-high heat in your pot. Brown the chicken skin-side down for 4–5 minutes until golden. Flip and brown the other side for 2 minutes. You’re not cooking through; you’re building flavor.
- Remove chicken and set aside. Add chopped onion to the pot and sauté for 2–3 minutes until translucent. Add garlic and sauté one minute more. Scrape up browned bits—those are flavor gems.
- Add rice to the pot and stir to coat in the onion-garlic oil. Toast the rice for a minute or two so it picks up all that goodness. This extra step is low-effort, high-reward.
- Pour in the chicken broth, the rest of the thyme, and a pinch more salt if your broth is very low-salt. Stir once to distribute. Scatter frozen peas and carrots over the rice (don’t stir them in).
- Nestle the browned chicken thighs into the rice, skin-side up. If you like lemon, tuck a slice or some zest under the chicken now. Put the lid on.
- Bake, undisturbed, for 40–50 minutes. Do not lift the lid. Seriously—dont peek. The steam is doing the work.
- After 40 minutes, check the chicken with a meat thermometer: it should read 165°F (74°C) at the thickest part. If it’s there, remove the lid and let the oven broil for 3–5 minutes to crisp the skin, watching carefully so it doesn’t burn.
- Remove from oven. Stir butter into the rice for silky texture. Let rest 5 minutes, garnish with fresh parsley or a squeeze of lemon, and serve straight from the pot.
Common Mistakes to Avoid
- Peeking mid-cook: Rookie move. Lifting the lid releases steam and messes with rice cooking. Play the long game and leave it alone.
- Using the wrong rice: Instant or quick-cook rice will turn to mush. Use long-grain white rice for predictable results.
- Skipping browning: You can skip it in a pinch, but browning gives flavor and sexier color. Two extra minutes = gratitude later.
- Too much or too little liquid: Too much = mush; too little = chewy rice. Measure carefully and trust the recipe ratios.
- Throwing in frozen chicken: Don’t. It lengthens cook time and risks uneven cooking. Thaw first.
- Expecting instant crispiness: If you want crunchy skin, finish under the broiler. The oven alone won’t make it crackly.
Alternatives & Substitutions
Out of something? No sweat. Here are easy swaps that keep life moving:
- Boneless chicken thighs or breasts: Use boneless thighs if you want faster cooking—reduce bake time by ~10–15 minutes. Breasts dry out faster, so check temp sooner.
- Brown rice: Totally doable, but needs more liquid and time (about 1 cup brown rice : 2 1/2 cups broth; bake 60–75 minutes). I love brown rice, but it asks for patience.
- Quinoa: Use 1 1/4 cups quinoa with 2 1/2 cups liquid. Quinoa cooks faster—start checking around 25–30 minutes.
- Dairy-free/creamier: Swap 1 cup of broth for coconut milk or heavy cream for a rich, slightly tropical twist. IMO, coconut milk loves curry spices if you go that route.
- Veg swap: Use bell peppers, mushrooms, or broccoli (add later so they don’t get mushy). Frozen spinach? Stir it in at the end.
- No Dutch oven? Use an oven-safe casserole with a tight foil seal. Just crimp it well so steam stays trapped.
FAQ (Frequently Asked Questions)
- Can I use boneless chicken?
- Yes—boneless cooks quicker. Reduce bake time by 10–15 minutes and check the internal temp early so it doesn’t dry out.
- Do I really have to preheat the oven?
- Yes. Preheating helps the rice start cooking evenly and gives predictable timing. It’s 2 minutes—worth it.
- What if my rice is still crunchy after the time is up?
- Add 1/4 cup hot broth, recover, and give it 5–10 more minutes. Oven temps vary. Also check that your lid sealed well.
- Can I use leftover cooked rice?
- You could, but it won’t soak up flavors the same way and may get gluey. Better to cook fresh rice for this method.
- Is this freezer-friendly?
- Yes and no. You can freeze portions, but rice texture changes after freezing/thawing. It’s fine for emergencies, not dinner-party bragging rights.
- Can I add cheese?
- Absolutely. Stir in grated Parmesan or cheddar at the end for creamy comfort. Add more if you’re feeling indulgent.
- Why did my chicken dry out?
- Likely overcooked or you used breasts and didn’t check temp early. Use a thermometer and pull at 165°F (74°C).
Final Thoughts
There you go—minimal fuss, maximum cozy vibes. This No-Peek Chicken and Rice is the kind of dinner that makes weeknights feel like you tried harder than you did. It’s great for busy nights, lazy weekends, or when you need something that feeds people without hostage-level kitchen time.
Remember: dont peek, use a proper vessel with a lid, and let the oven do the work. Want crispy skin? Broil at the end. Want more veggies? Toss them in. Want to brag? Send a pic.
Now go impress someone—or yourself—with your new culinary skills. You’ve earned it. And if anyone asks for the recipe, tell them it’s full of secrets. The truth? It’s mostly steam and good decisions.
Leave a Reply