No Bake Chocolate Cheesecake — Easy, No-Oven, Quick & Creamy
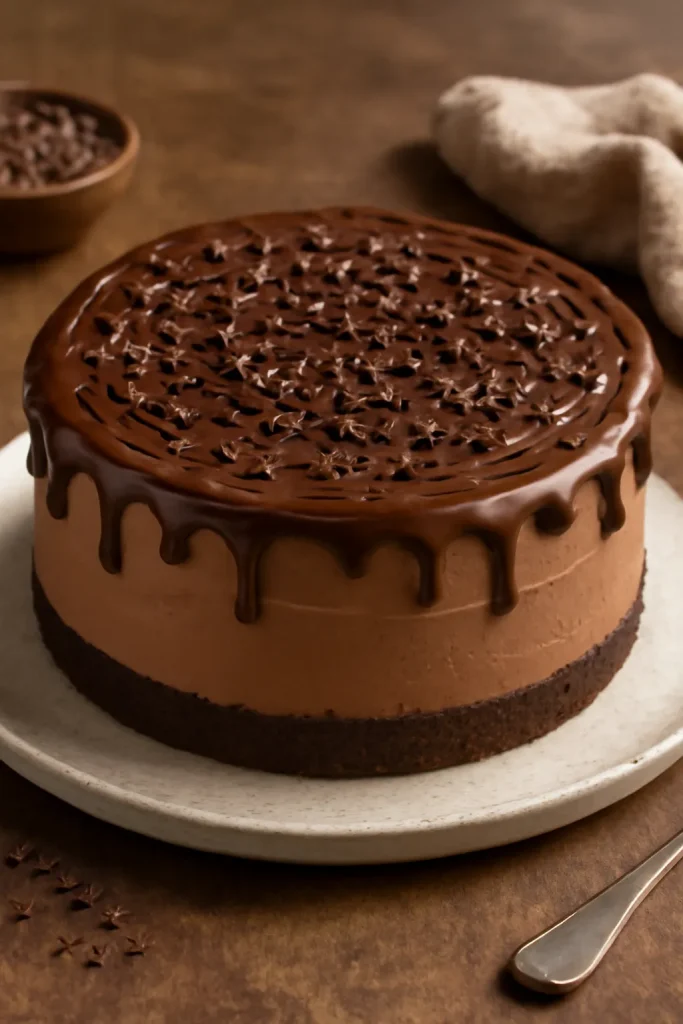
Imagine a glossy, dark chocolate crown resting atop a pale, velvety cream that yields to the fork with the smallest, melodious sigh. The first aroma is warm cocoa, then a subtle tang of cream cheese and buttered biscuit wafting through the kitchen. A No Bake Chocolate Cheesecake invites you to taste contrasts: a crisp, chocolatey base, a light yet richly chocolate-infused filling, and a cool, silken finish that melts across your tongue. Making it is as comforting as eating it — a slow, reassuring choreography of melting, whisking, and folding that ends in quiet suspense as the cake chills, transforming from mousse-like silk to sliceable perfection.
- Why You’ll Love This No Bake Chocolate Cheesecake:
- Ingredients for This No Bake Chocolate Cheesecake:
- Step-by-Step Instructions for No Bake Chocolate Cheesecake:
- Tips for Perfect Results:
- Options for Substitutions:
- Watch Out for These Mistakes:
- Estimated Nutrition (per serving)
- Frequently Asked Questions
- Conclusion
Why You’ll Love This No Bake Chocolate Cheesecake:
This dessert is a study in elegance without pretense. It combines the deep, bittersweet satisfaction of dark chocolate with the gentle tang of cream cheese, balanced by a buttery chocolate crust that crackles under the knife. Because it never visits an oven, the texture remains light and airy — more mousse than dense cake — yet it slices cleanly when given time to set. Visually, the contrast between the dark ganache and the pale interior is stunning; a dusting of cocoa or a scattering of sea salt flakes turns it into an effortlessly dramatic centerpiece.
Beyond appearance, its versatile: make it for a cozy family night, scale up for dinner parties, or prepare mini versions for individual servings. The recipe is forgiving enough for cooks of all levels and adaptable to dietary needs with simple swaps. And perhaps most importantly, it delivers immediate comfort — chocolate that feels both indulgent and approachable, with a texture that is simultaneously airy and decadent.
Ingredients for This No Bake Chocolate Cheesecake:
| Ingredient | Amount | Role / Short Description |
|---|---|---|
| Chocolate sandwich cookies (e.g., Oreos), crushed | 200 g (about 24 cookies) | Provides a crisp, chocolatey base; crumbs bonded with butter form the crust |
| Unsalted butter, melted | 6 tbsp (85 g) | Binds crumbs, adds richness and firmness to the crust |
| Cream cheese, room temperature | 16 oz (450 g) | Primary structure and tang; yields a silky, tangy filling |
| Powdered sugar | 1/2 cup (60 g) | Sweetens and smooths the filling without graininess |
| Heavy cream (cold) | 1 cup (240 ml) | Whipped to lighten the filling; contributes to mousse-like texture |
| Dark chocolate (70% cocoa recommended), chopped | 8 oz (225 g) | Melted into the filling for deep chocolate flavor and richness |
| Vanilla extract | 1 tsp | Enhances flavor complexity and aroma |
| Sea salt | Pinch | Balances sweetness and amplifies chocolate notes |
| Optional: unflavored powdered gelatin | 1 tsp (about 4 g) + 2 tbsp water | For a firmer, cleaner slice (optional but helpful in warm climates) |
| Optional topping: chocolate ganache | Additional 4 oz (115 g) chocolate + 1/2 cup (120 ml) cream | Creates a glossy finish and richer chocolate contrast |
Step-by-Step Instructions for No Bake Chocolate Cheesecake:
- Prepare your pan. Line a 9-inch (23 cm) springform pan with parchment on the bottom and lightly grease the sides so the cheesecake releases cleanly. Chilling the pan briefly helps the crust set faster.
- Make the crust. Pulse the cookies in a food processor until they resemble coarse sand. Mix in the melted butter until the mixture holds together when pressed. Press the crumbs into the bottom and slightly up the sides of the pan using the back of a measuring cup for an even, compact layer. Press firmly but evenly to avoid a crumbly crust.
- Chill the crust. Place the pan in the refrigerator for at least 20 minutes to firm the butter and stabilize the base. This prevents a soggy bottom once the filling is added.
- Melt the chocolate. Gently melt the chopped dark chocolate over a double boiler or in short bursts in the microwave (stirring every 20 seconds). Let the chocolate cool slightly but remain fluid — it should be warm, not hot.
- Beat the cream cheese. In a bowl, beat the room-temperature cream cheese with powdered sugar and vanilla until very smooth and free of lumps. Start with the cream cheese fully softened for a lump-free filling.
- Temper and combine. Slowly add the cooled, melted chocolate to the whipped cream cheese mixture, mixing until the color is uniform and the texture is glossy. Add a pinch of salt to brighten the chocolate.
- Optional: incorporate gelatin. If using gelatin for extra firmness, sprinkle the powder over 2 tablespoons of cold water and let bloom for 5 minutes. Gently warm until dissolved (do not boil), then whisk a tablespoon of the chocolate-cheesecake mixture into the gelatin to temper it, and fold the gelatin back into the filling for even distribution.
- Whip the cream. In a separate chilled bowl, whip the cold heavy cream to soft-medium peaks. It should be light and billowy but not grainy. Whipping to the correct peak ensures a silky lift without becoming butter.
- Fold to combine. Gently fold about one-third of the whipped cream into the chocolate-cream cheese mixture to lighten it, then fold in the remaining cream until no white streaks remain. Use a spatula and fold with a gentle figure-eight motion to keep air in the filling.
- Fill the pan. Spoon or pour the filling over the chilled crust, smoothing the top with an offset spatula. Tap the pan gently on the counter to release any trapped air bubbles.
- Chill to set. Cover the cheesecake with plastic wrap and refrigerate for at least 4 hours, preferably overnight, until set. For quicker service, place in the freezer for 1–2 hours and then transfer to the fridge to finish chilling.
- Optional ganache topping. Warm the cream and pour over chopped chocolate; let sit for a minute, then stir until glossy. Allow the ganache to cool slightly before pouring over the chilled cheesecake. Smooth it out and return to the fridge for 30 minutes to set.
- Slice and serve. Run a thin knife under hot water, dry it, then slice the cheesecake in one clean motion between cuts, wiping the knife between slices for neat presentation. Garnish with cocoa powder, chocolate shavings, or a sprinkle of flaky sea salt.
Tips for Perfect Results:
- Bring cream cheese to room temperature: this ensures a silky filling without lumps.
- Temper the chocolate: let melted chocolate cool slightly and add a spoonful of the filling to it before combining — this prevents a thick, grainy mixture.
- Dont over-whip the cream: stop at soft-medium peaks for a light, airy texture; over-whipping makes the cream grainy and reduces incorporation.
- Use a springform pan: it makes removal and presentation effortless. Lining the bottom with parchment ensures smooth release.
- Chill thoroughly: patience pays — overnight refrigeration yields the most elegant slices.
- Warm the knife between cuts: dip in hot water, dry, and slice for clean, glossy edges.
- Stabilize with gelatin if serving in warm settings: a small amount helps retain shape during transport or in warmer climates.
Options for Substitutions:
Recipes are invitations to make a dish your own. Here are practical alternatives to keep the structure intact while accommodating taste or dietary needs:
- For a gluten-free crust: use gluten-free chocolate sandwich cookies or a mix of almond meal and cocoa powder with a touch more butter.
- Dairy-free option: replace cream cheese with a high-quality vegan cream cheese and use canned full-fat coconut cream whipped to soft peaks. Use dairy-free chocolate.
- Lower-sugar alternative: substitute powdered sugar with a powdered sugar substitute meant for baking (e.g., powdered erythritol) or reduce to 1/3 cup and taste as you go.
- Firming agents: agar-agar can replace gelatin (use according to package instructions; it sets more firmly and needs boiling to activate).
- Chocolate swaps: use milk chocolate for a sweeter, milder cake or 55–60% dark for a more balanced, less bitter flavor. White chocolate can be used for a vanilla-chocolate twist with cocoa powder added for color contrast.
- Crust variations: swap cookie crumbs for graham crackers, shortbread, or toasted nuts for added texture and flavor.
Watch Out for These Mistakes:
- Using cold cream cheese: this leads to lumps. Always soften to room temperature for a smooth filling.
- Adding hot chocolate to the cream cheese: hot chocolate can melt the cream cheese and whipped cream, causing a loose or oily filling. Let chocolate cool slightly before combining.
- Over-whipping cream: this can turn the cream grainy or into butter, ruining the light texture.
- Rushing the chill time: slicing too early results in a messy, under-set center; plan at least 4 hours or overnight.
- Pressing the crust unevenly: a crumbly or cracked crust is often due to uneven pressure or too little butter. Press evenly and compact firmly.
- Skipping the knife wipe between slices: messy slices make for an untidy presentation; warm and clean the knife between cuts.
Estimated Nutrition (per serving)
Estimated values are approximate and will vary with exact brands and portions. This recipe yields about 12 slices.
- Calories: 480 kcal
- Protein: 6 g
- Carbohydrates: 34 g (of which sugars ~22 g)
- Fat: 36 g (saturated fat ~20 g)
- Fiber: 2 g
- Sodium: 220 mg
To reduce calories, consider lighter crusts, lower-fat cream cheese, or portioning into 16 smaller slices. For precise tracking, enter your specific ingredients into a nutrition calculator.
Frequently Asked Questions
Do I need gelatin for a no-bake cheesecake?
No, gelatin is optional. Without gelatin you’ll get a lighter, mousse-like cheesecake that still slices well after adequate chilling. Add gelatin if you need firmer slices for transport, warm climates, or particularly neat presentation.
How long can I keep this cheesecake in the refrigerator?
Stored in an airtight container or covered well, the cheesecake will keep in the refrigerator for 4–5 days. For longer storage, wrap tightly and freeze for up to 2 months; thaw overnight in the fridge before serving.
Can I make this in advance for a party?
Absolutely — this cheesecake is excellent made a day or two ahead. In fact, chilling overnight improves flavor melding and texture. Add delicate garnishes right before serving for the best presentation.
Why is my filling grainy after I added the chocolate?
Graininess often comes from adding very hot chocolate to a cold mixture, causing the fats to seize, or from over-whipping. Cool the melted chocolate slightly before adding and combine gently. If needed, briefly warm and whisk to smooth, then cool and proceed.
Conclusion
Making a No Bake Chocolate Cheesecake is an act of quiet indulgence: a series of gentle steps that culminate in a stunning dessert. As you press the crust, stir the chocolate, and fold the cream, you are crafting more than a dish — you are shaping a moment that will be shared, sliced, and remembered. Whether you serve it at a celebration or keep a small slice for yourself, this cheesecake offers warmth, decadence, and the comforting knowledge that beautiful things can be made without rushing. Let it chill, let flavors deepen, and when you finally cut the first slice, breathe in that cocoa perfume and enjoy the soft, luxurious reward.
Leave a Reply