Authentic Italian Chicken Parmesan Recipe - Easy Weeknights
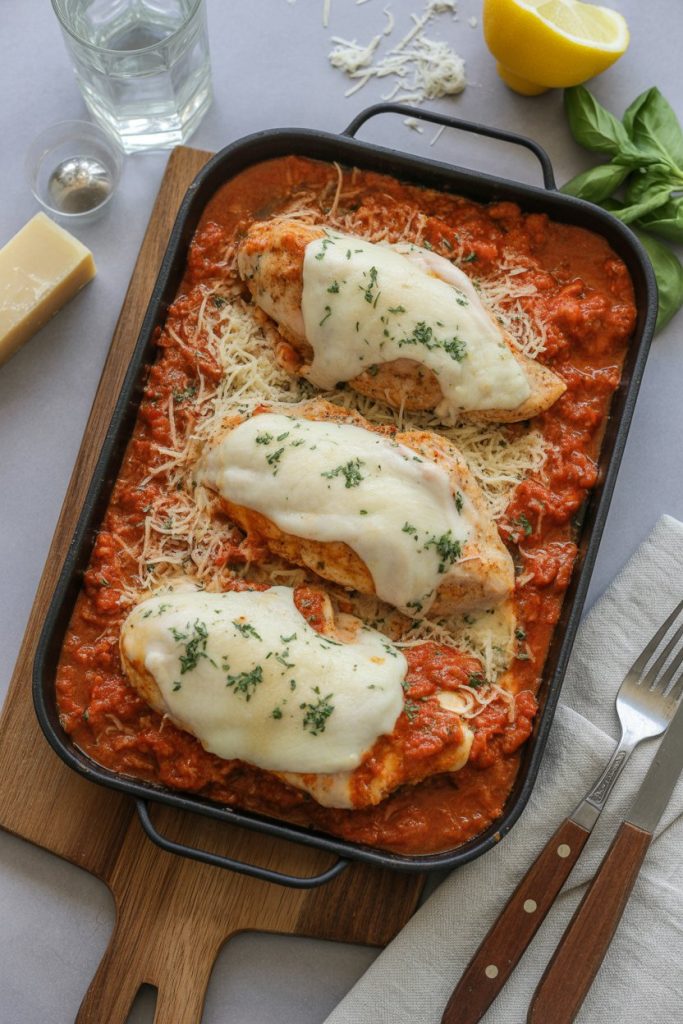
Craving the rich, comforting flavors of Italy but short on time during busy weeknights? Look no further! Today, we're bringing the heart of Italian cuisine right to your table with our Authentic Italian Chicken Parmesan recipe. This isn't just another version; it's a simplified yet genuinely flavorful approach to a beloved classic, designed specifically for those hectic evenings. We've streamlined the process without compromising on the deep, savory notes and satisfying textures that define true Italian cooking. Get ready to indulge in perfectly cooked chicken, smothered in a vibrant tomato sauce and bubbling cheese, all with minimal fuss. Embrace the joy of an authentic Italian meal, made easy for any weeknight!
Why This Recipe is Awesome
Because it hits all the right buttons: crunchy, saucy, cheesy, and ridiculously comforting. It’s idiot-proof—I promise I didn’t mess it up the first time, and you won’t either. Want dinner that feels like a hug but has a little crunch? This is it.
Also, it scales well, reheats like a champ, and freezes if you decide to meal-prep. Who knew being domestic could feel this effortless?
Ingredients Youll Need
| Ingredient | Amount | Notes (short & sassy) |
|---|---|---|
| Boneless, skinless chicken breasts | 4 (about 1½–2 lbs) | Pound them thin—don’t be shy. |
| All-purpose flour | ½ cup | For dredging; seasoned with salt & pepper. |
| Large eggs | 2 | Beat them; theyre the glue. |
| Panko breadcrumbs | 1½ cups | Use panko for max crunch. |
| Grated Parmesan | ½ cup | Better fresh than dusty jar stuff. |
| Italian seasoning & parsley | 1–2 tsp + 2 tbsp chopped | Flavor boost. Don’t skip. |
| Salt & pepper | To taste | Always season—life rule. |
| Olive oil + a pat of butter | 2–3 tbsp oil + 1 tbsp butter | Oil for frying, butter for flavor. |
| Marinara sauce | 2 cups (store-bought or homemade) | Use a good one. This is the sauce-era. |
| Mozzarella (shredded or slices) | 8 oz | Whole-milk is juicier. Less is sad. |
| Extra Parmesan (for topping) | 2–4 tbsp | Because one Parm is never enough. |
| Fresh basil (optional) | Handful | Pretty and aromatic. Yes, add it. |
Step-by-Step Instructions
- Preheat and prep: Preheat oven to 425°F (220°C). Line a baking sheet with foil or use a shallow baking dish. Set up a dredging station: flour in one bowl, beaten eggs in another, and panko + Parmesan + seasoning in a third.
- Pound the chicken: Place each breast between plastic wrap and pound to about ½ inch thickness. This helps them cook evenly and stay tender. Yes, the whack-a-mallet method works.
- Season the chicken: Sprinkle salt and pepper on both sides. Don’t be stingy—this is where flavor starts.
- Dredge: Coat each piece in flour (shake off excess), dunk in beaten egg, then press into the breadcrumb mixture. Press hard so crumbs stick. For extra crunch, double-dip (egg again, panko again).
- Pan-fry until golden: Heat oil and a pat of butter in a large skillet over medium-high heat. Fry the cutlets 2–3 minutes per side until golden (they don’t need to be fully cooked). Work in batches—don’t crowd the pan.
- Assemble: Spoon a thin layer of marinara on the baking dish. Place fried cutlets on top. Spoon more sauce over each cutlet, then top with mozzarella and a generous sprinkle of Parmesan.
- Bake: Bake in the preheated oven for 10–15 minutes, until cheese melts and sauce bubbles. If you like browned cheese, broil for 1–2 minutes at the end—watch it like a hawk.
- Rest and garnish: Let the cutlets rest for 3–5 minutes. Garnish with fresh basil and a little extra Parmesan. Serve over pasta, polenta, or with a crusty loaf for sopping.
- Check temp: If you care about exactness, the internal temp should read 165°F (74°C). But if you’ve followed the steps, you’re probably fine—just don’t serve raw chicken.
Common Mistakes to Avoid
- Skipping the pound: Thick breasts cook unevenly and dry out. Flatten them—your future self will thank you.
- Not preheating the oven: Rookie move. Bake in a hot oven so the cheese melts quickly and the sauce doesn’t make the crust soggy.
- Crowding the skillet: Overcrowding drops the oil temp and yields soggy breading. Fry in batches.
- Using watery mozzarella: Avoid fresh mozzarella packed in water unless you pat it very dry. Too much moisture = limp cheese and wet crust.
- Skipping seasoning in breadcrumbs: Don’t rely on the sauce for all the flavor. Season the crumbs and the chicken itself.
- Letting it steam: Plopping the hot cutlets into sauce and covering tightly creates steam and kills the crunch. Bake uncovered or use a light tent if needed.
Alternatives & Substitutions
Want to switch things up? Totally doable. Here are simple swaps that keep the vibe without sacrificing flavor.
- Chicken to Eggplant: Slice eggplant ½-inch thick, salt it to remove bitterness, then bread and cook the same way for Eggplant Parmesan. Vegetarians rejoice.
- Panko to regular breadcrumbs: Use regular Italian breadcrumbs if you don’t have panko. The texture will be slightly denser but still tasty.
- Gluten-free: Use gluten-free panko or crushed GF crackers and GF flour for dredging.
- Dairy-free: Use vegan mozzarella and nutritional yeast in the breadcrumb mix. You’ll miss some melty goodness, but it still works.
- Air fryer option: Air-fry the breaded cutlets at 400°F for 8–10 minutes, flipping halfway, then top with sauce & cheese and air-fry another 2–3 minutes—or finish in the oven.
- Make it saucy: Want extra sauce? Go for it—just serve a bit on the side for dipping to preserve crispiness.
FYI, I love the panko + Parmesan combo. IMO, it’s the secret to that perfect crust.
FAQ (Frequently Asked Questions)
- Can I use chicken thighs instead of breasts? Sure. Boneless thighs stay juicier and add flavor. Adjust cooking time slightly—thicker pieces may need a minute or two more in the oven.
- Can I make this ahead of time? Yep. Fry and assemble, then refrigerate unbaked for up to 24 hours. Bake when you’re ready. You can also fully bake and reheat—see storage tips below.
- Can I freeze it? Absolutely. Freeze fully cooked cutlets layered with parchment in a container for up to 3 months. Reheat from frozen in a 375°F oven for 20–30 minutes until hot.
- How do I keep it crispy after baking? Bake uncovered on a wire rack set over a sheet pan so air circulates under the cutlets. Don’t cover them with foil—too much steam = soggy crust.
- What’s the best cheese to use? Whole-milk mozzarella melts best; low-moisture mozzarella gives a slightly firmer melt. A little fresh grated Parmesan on top adds salty depth.
- Can I skip frying and just bake? You can. Spray the breaded cutlets lightly with oil and bake at 425°F for 15–20 minutes, flipping halfway. They’ll be crisp-ish but not quite as golden as pan-fried.
- What should I serve it with? Pasta, garlic bread, a simple arugula salad, or roasted veggies. Or just eat it straight from the pan—no judgment here.
Final Thoughts
There you go—a classic Chicken Parmesan that looks like you spent way more time on it than you did. It’s crunchy, cheesy, and comfort-food-approved. Don’t stress the little things; cooking should be fun, not stressful.
Pro tip: If you want show-off mode on, sprinkle extra grated Parmesan and finish with fresh basil right before serving. It makes you look intentional and fancy.
Now go impress someone—or yourself—with your new culinary skills. You’ve earned it. And if anyone tries to tell you it’s too much work, send them a plate and a polite smirk.
Leave a Reply