Garlic Parmesan Chicken: Easy Crispy Baked Dinner Recipe Now
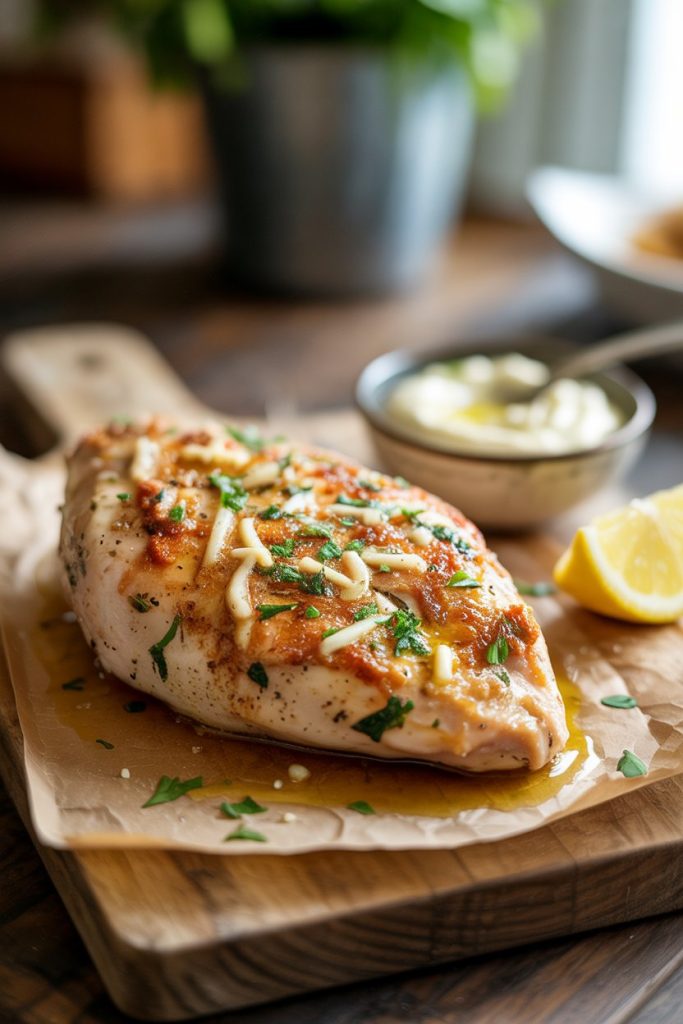
Let's face it, sometimes you just need that golden, crispy, incredibly flavorful chicken that makes everyone at the table say "Wow!" But who has hours for marinating and complicated frying on a busy weeknight? If you're craving a dish that delivers big on taste without the big effort, then you've stumbled upon your new go-to. Get ready for Garlic Parmesan Chicken – the ultimate blend of savory garlic, nutty Parmesan, and an unbelievably Crispy Baked finish. This isn't just dinner; it's an Easy weeknight triumph, promising deliciousness on your plate Now!
Why This Recipe is Awesome
Short version: it’s fast, forgiving, and delicious. Long version: succulent chicken, garlicky butter, a crunchy Parmesan crust—whats not to love?
It’s basically idiot-proof. Seriously. Even if you juggle the oven timer and a phone call, this dish forgives mistakes. It reheats well, freezes okay, and pairs with almost anything—rice, salad, pasta, or a guilty pile of roasted potatoes.
Also: you get that classy “I made this” vibe without needing chef pants. Win-win.
Ingredients Youll Need
| Ingredient | Amount / Notes |
|---|---|
| Boneless skinless chicken breasts | 4 (about 1.5–2 lbs) — pound thin for even cooking |
| Salt & pepper | To taste — don’t be shy |
| Garlic | 4 cloves, minced (or 1½ tsp garlic powder if you’re out) |
| Unsalted butter | 4 tbsp (melted) — substitute olive oil if needed |
| Grated Parmesan cheese | 3/4 cup packed — yes, use real Parm for best results |
| Panko breadcrumbs | 3/4 cup — for extra crunch |
| Italian seasoning | 1 tsp (or mix oregano, basil, thyme) |
| Lemon | 1, zested and juiced — freshness booster |
| Fresh parsley | 2 tbsp chopped — optional but pretty |
| Olive oil | 1–2 tbsp (for searing, optional) |
Step-by-Step Instructions
- Preheat the oven to 400°F (200°C). Preheating matters. Give it a few minutes so the oven actually reaches temp.
- Pound the chicken to an even thickness (about ¾ inch). This helps it cook evenly and stay juicy. Throw on some kitchen theatrics if you like, but don’t anger the plastic wrap.
- Season both sides of the chicken with salt and pepper. Don’t just whisper the salt—season confidently.
- Mix the topping: combine Parmesan, panko, Italian seasoning, lemon zest, and parsley in a bowl. Stir to combine. Add a pinch more salt if your Parm isn’t salty enough.
- Melt butter and mix in the minced garlic and lemon juice. Pour about half the garlic butter over the chicken and rub it in. Save the rest for the crumble mix.
- If you want a golden crust, heat a skillet with 1 tbsp olive oil over medium-high heat and sear chicken 1–2 minutes per side—just enough to brown. This step is optional but lovely.
- Press the Parmesan-panko mixture onto the top of each chicken breast, then drizzle the remaining garlic butter over the topping. Press firmly so the crust sticks.
- Place breasts on a baking sheet or in a baking dish and bake for 18–22 minutes, depending on thickness. Use a meat thermometer: 165°F (74°C) at the thickest part.
- Let the chicken rest 5 minutes before serving. Resting keeps juices where they belong—in the chicken, not all over your plate.
- Garnish with extra parsley and a squeeze of lemon. Serve with something chill—mashed potatoes, a simple salad, or steamed broccoli. Boom.
Common Mistakes to Avoid
- Skipping the pound-to-even-thickness step: undercooked middles or dried edges? Dont be that person.
- Not preheating the oven: this ruins timing and crispness. Preheat. Always.
- Using too little salt: Parmesan is salty, but chicken needs love. Taste the topping and adjust.
- Overbaking: chicken gets dry fast. Use a thermometer or err on the side of checking early.
- Not resting the chicken: cut too soon and you’ll lose the juices. Wait 5 minutes—its worth it.
Alternatives & Substitutions
Out of something? No drama. Here are swaps that work without making the dish weird.
- Chicken thighs instead of breasts? Great choice if you like extra juiciness. Reduce bake time slightly if they’re smaller, and check temp.
- No panko? Use regular breadcrumbs or crushed crackers. Panko gives the best crunch, IMO, but life goes on.
- Grated Parmesan a no-go? Pecorino Romano works but tastes stronger—use a touch less.
- Butter shortage? Use olive oil for a lighter version. You’ll miss the butter-rich taste, but it’ll still be tasty.
- Garlic powder instead of minced garlic? Fine. Use ¾–1 tsp garlic powder. Fresh garlic just sings more, FYI.
- Gluten-free? Use gluten-free breadcrumbs or crushed GF cereal, and confirm your Parmesan is labeled GF.
FAQ (Frequently Asked Questions)
Can I make this ahead of time? Sure—bake it, cool it, then store in the fridge for up to 3 days. Reheat gently in a 350°F oven to keep the crust crisp-ish.
Can I use frozen chicken? Why would you, hero? Thaw it fully before pounding and seasoning. Cook from partially frozen = uneven results.
How do I keep the crust from falling off? Press the topping firmly and drizzle the garlic butter over it before baking. Sear first if you want extra adhesion.
Can I grill this instead of baking? Yep. Grill over medium heat, indirect if possible, and close the lid. Watch the cheese so it doesn’t burn.
Is this kid-friendly? Absolutely. Kids usually love crunchy tops and cheesy flavors. Cut into strips for picky eaters—they’ll gobble em up.
What sides should I serve? Anything. Pasta, rice, roasted veggies, or a chilled salad. Want a fancy touch? Drizzle a little balsamic reduction over the side greens.
Can I double the recipe? Totally. Use a bigger pan or two pans to avoid crowding. Crowded chicken steams instead of browns—no thanks.
Final Thoughts
If you made it this far, congratulations—you clearly enjoy good food and small triumphs. This Garlic Parmesan Chicken gives you a lot of flavor for very little effort. It’s perfect for weeknights, impressing friends, or pretending you meal-prepped like a legend.
Remember: season confidently, use a thermometer, and let it rest. Those three moves make this recipe sing. Now go impress someone—or yourself—with your new culinary skills. Youve earned it!
Want variations or help scaling this recipe? Ask me and I’ll happily meddle in your dinner plans.
Leave a Reply