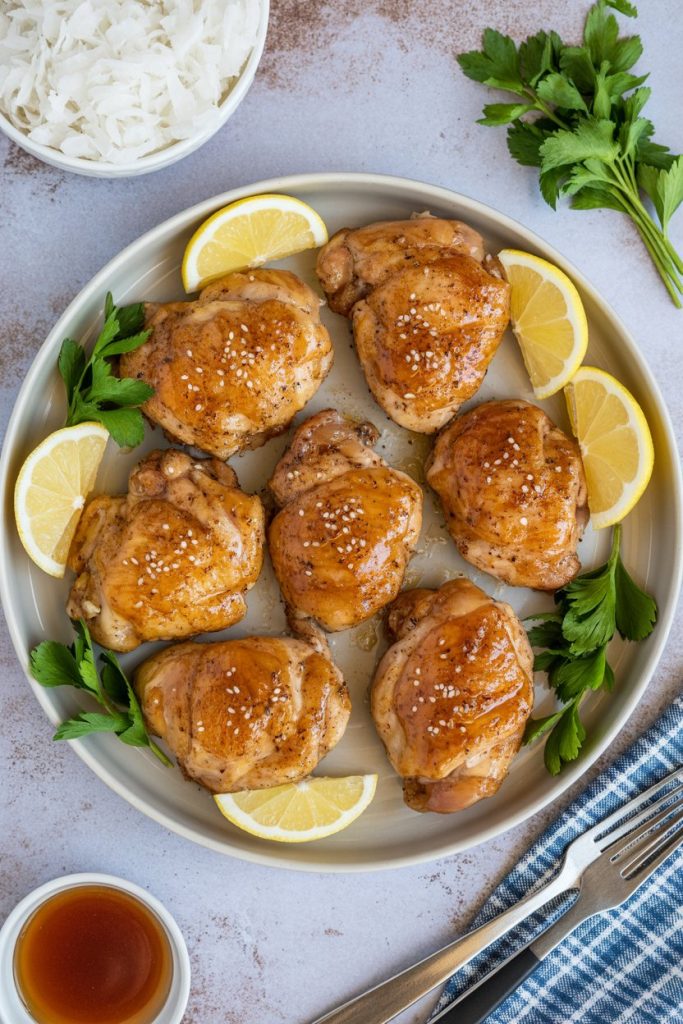
Crispy & Sticky Air Fryer Honey Garlic Chicken Thighs Recipe
Imagine biting into chicken that's perfectly golden and crackling on the outside, incredibly tender and juicy within, all coated in a rich, sweet, and savory glaze. For too long, achieving this level of deliciousness meant messy frying or complex oven steps. But what if you could unlock this culinary magic with remarkable ease? Your air fryer is about to become your secret weapon! Prepare for the ultimate weeknight revelation: Crispy & Sticky Air Fryer Honey Garlic Chicken Thighs. This recipe isn't just a meal; it's a symphony of textures and flavors, effortlessly delivered. Get ready to impress yourself!
Why This Recipe is Awesome
Because it hits all the things: crispy skin, juicy meat, a glossy honey-garlic glaze, and zero fuss. You don’t need oven-space jockeying, you don’t need to babysit a pan, and it’s basically idiot-proof—even I didn’t mess it up (and I once burned water).
This recipe works with bone-in or boneless thighs, scales easily, and takes under 40 minutes from start to finish if you don’t marinate for ages. Want to impress someone? Boom. Want to feed yourself like a civilized adult? Also boom.
Ingredients Youll Need
| Ingredient | Amount | Notes (snappy, useful) |
|---|---|---|
| Chicken thighs | 4–6 (about 2 lbs / 900 g) | Skin-on, bone-in for max flavor. Boneless works too. |
| Soy sauce | 3 tbsp | Use low-sodium if you’re salty by nature or taste. |
| Honey | 3 tbsp | Swap for maple if you’re feeling wild. |
| Garlic | 4 cloves, minced | If you love garlic, double it. I won’t judge. |
| Olive oil (or neutral oil) | 1 tbsp | Helps with browning. |
| Rice vinegar (or lemon juice) | 1 tbsp | Brightens the sauce. |
| Sriracha (optional) | 1 tsp | For a little kick. |
| Cornstarch + water | 1 tsp + 1 tbsp | Make a slurry to thicken the glaze (optional but nice). |
| Salt & pepper | To taste | Season the chicken well. |
| Green onions / sesame seeds | For garnish | Because presentation matters, even for you. |
Step-by-Step Instructions
- Prep the thighs. Pat chicken dry with paper towels and season both sides with salt and pepper. Dry skin = crisp skin. Trust me.
- Make the marinade. Whisk together soy sauce, honey, minced garlic, olive oil, rice vinegar, and sriracha (if using). Pour half into a bowl and set the other half aside for glazing (but don’t use it raw—see note later).
- Marinate. Coat the thighs in the marinade and let them sit for 20–30 minutes at room temp or up to 8 hours in the fridge. Don’t stress if you skip long marinating—still delicious.
- Preheat the air fryer. Preheat to 400°F (200°C) for 3–5 minutes. Preheating improves crispness. Yep, it matters.
- Arrange the thighs. Place thighs skin-side down in a single layer in the basket. Don’t overcrowd; give them breathing room. Work in batches if needed.
- Cook. Air fry at 400°F (200°C). Bone-in: 18–22 minutes, flipping halfway. Boneless: 12–15 minutes, flipping halfway. Aim for an internal temperature of 165°F (74°C).
- Make the glaze. Pour the reserved marinade into a small saucepan. Bring to a simmer and add the cornstarch slurry. Cook 1–2 minutes until glossy and thickened. You must cook it—raw marinade equals bacteria, not flavor.
- Glaze and finish. Brush the cooked thighs with the hot glaze and air-fry 1–2 minutes more to set it. This gives you that sticky, shiny goodness.
- Rest and serve. Let the chicken rest 5 minutes. Sprinkle with green onions and sesame seeds. Slice into rice, salad, or your face.
Common Mistakes to Avoid
- Skipping preheat. Cold air fryer = limp skin. Preheat like you mean it.
- Using raw marinade as glaze. Ew. Cook it first. Food safety > shortcuts.
- Overcrowding the basket. Steam happens. Steam = soggy skin. Space out the pieces.
- Under-seasoning. Honey masks nothing. Salt your chicken properly before marinating.
- Trusting time over temp. Cooking times vary by air fryer model. Use an instant-read thermometer if you want perfection.
Alternatives & Substitutions
Short on soy sauce? Use tamari or coconut aminos if you want gluten-free. No honey? Maple syrup or agave saves the day. Out of garlic? Use 1 tsp garlic powder—less personality, still works.
Prefer less sugar? Use 2 tbsp honey and 1 tbsp soy sauce, or add a splash more vinegar for balance. Want super-crispy? Lightly dust the skin with a pinch of cornstarch or baking powder before air-frying—IMO, that trick is underrated.
Vegetarian vibe? Firm tofu marinated and air-fried at 375°F for 12–15 minutes (flip halfway) makes a decent analogue. It won’t be chicken, but it’ll be tasty.
FAQ (Frequently Asked Questions)
Can I use chicken breasts instead of thighs? Sure, but breasts dry out faster. Lower the temp to 375°F and check at 10–12 minutes. Aim for 165°F and stop cooking immediately.
Can I skip the glaze step? You can, but then you’ll miss the sticky-sweet finish. If you’re lazy, toss the thighs in the reserved marinade after cooking only if you cooked the marinade first.
Do I have to flip the thighs? Yep. Flip once halfway to get even browning and crisp skin all around. The air fryer isn’t a magic rotisserie—yet.
How long can I marinate them? 20 minutes to 8 hours works great. Over 12 hours and the acids can start to change the texture a bit. Short marinate? Still tasty.
Can I make this ahead? Absolutely. Reheat in the air fryer at 350°F for 4–6 minutes to crisp them back up. Sauce keeps well in the fridge for 3–4 days.
Is this kid-friendly? Yep. Leave out the sriracha and you’ll get universal appeal. Kids love sticky stuff—science says so.
Final Thoughts
There you go: sticky, garlicky, honey-coated thighs that make dinner feel fancy with minimal drama. This is one of those meals you can make on a weeknight and pretend you planned the whole thing. Add a simple side—rice, roasted veggies, or a salad—and call it a win.
Remember: pat the skin dry, preheat the air fryer, and cook the marinade before glazing. Those three little moves make a huge difference.
Now go impress someone—or yourself—with your new culinary skills. You’ve earned it. Also, take a photo; your friends need to know how real your life looks.
Leave a Reply